Monday, January 12, 2015

Construction Zone 101

The procedures I follow when assembling my designs have me behaving like a construction site supervisor. It amuses me to imagine wearing a hard hat while working on my pictorials. There is an informal organization plan I rely upon to oversee the building of a wall hanging, large or small. I rarely diverge from this scheme and offer a view in this posting and the next ones.

Planning Phase. Long ago I established a routine when dealing with creative musings, which may have been sparked by reading, by something seen on a walk, or by brainstorming a flash of an idea popping into mind. I spend a lot of time stewing, planning, wrestling and turning ideas around, examining them from all angles. My reality is if I do not “see” a fairly clear picture in my mind for a design, it will be a struggle to capture it on paper, and eventually be discarded.

A sketchbook tends to be my starting point and I spend time making many small rudimentary sketches trying to anchor a spark before it is lost. For Watchful, this began with seeing a dog sitting on top of a pick-up truck in a parking lot. I did not have my camera, but I whipped out my sketchbook I carry with me everywhere. 

A rough drawing to capture the essence of concern
   
Master Pattern: The advantage of doing sketches followed by refined drawings is, I become more familiar with the design concept, am able to start planning the compositional layout and begin resolving potential problems I may confront long before I commit fabric and time. Paper is cheap. Textiles are not. The next step will be drawing a refined, full-size master pattern that becomes the road map (site plan), which is never cut up during construction. Again, I am becoming more intimate with the design and its challenges. A critical review of the master plan will take place before picking up the scissors to begin the work. Of course, adjustments and changes do occur during the process of stitching and completing the work. 


A full size master drawing is created.

Work Routine. I use to stitch everything by hand, but concluded I will not live long enough to finish all my ideas. Consequently, my preference is machine appliqué with turned under edges, machine embroidery and quilting. After selecting fabric, I cut out swatches to make a “swatch board” with notes to remind me of decisions made, thus, reducing the need to revisit decisions each time I return to my studio. Next, I will begin by tracing, marking and cutting freezer paper templates starting with the main character and begin stitching together the body parts. In this example, it is a wolf.

This illustrates the swatch board in the upper right corner, a tracing of a wolf, its freezer paper replica from which templates are cut. On the far left is a collection of fabric choices for the wolf's fur. 

Contrary to traditional appliqué, the backgrounds and support layers are the last choices I make. I work my designs from the top down to the backdrop layers to avoid being doomed by poor choices that may not work well in the long run. I do not want to rip out and redo. As a result, I will have body parts, or other segments, strewn about my studio awaiting further development. When enough segments have been assembled and are ready to be pulled together, I am able to fit the units with its adjacent details like putting a picture puzzle together. 


This dog hung around until the front porch was stitched together. He eventually claimed his spot where he could watch everything. The amazing thing is, his eyes will follow the viewer passing by this pictorial. See the full photo of Watchful at the bottom.

 Another example to show how body parts and other elements are constructed separately from the eventual full design is in this photo:
 

Two horses are arranged running beside the large one, and a fourth is trying to catch up. The group "galloped" for weeks on a design wall in my studio until the background terrain could be assembled for Windspirit.
  

Saturday, December 27, 2014

Stretched Canvas Mounts

Another favorite method to use for preparing quilted artwork to display in galleries is to mount the work on fabric-wrapped, stretched canvas surfaces which can be purchased at any art supply dealer, locally or on line. Stretched canvases are made in a variety of sizes and shapes, square, rectangular and even circular. For wrapping a stretched canvas select the size and profile desired to mount and display the quilted art work. The choices for profiles (depth of canvas) are 3/4”, a typical profile; or, one can choose a 1 3/8” Gallery profile or a  2 3/8” Museum profile. 

To wrap a stretched canvas with fabric, the additional supplies needed are: staple gun with 1/4” staples,  background fabric to coordinate with the artwork, a finished quilted piece, eye screws and picture wire.

I like using a 9”x 9” square canvas with a Museum profile because I like depth the mounted work projects from the wall after it is hung. A 7” square pictorial (with a 1” background margin around four sides) centers nicely on the covered canvas. For groupings such as above, I use the same batik fabric to cover all 8 canvases, and varied the finished theme-related artwork that were stitched on top. Each one one sold. 

The method for making the fabric wrap is straightforward and is easily accomplished after practicing with one or two stretched canvases. 


The size of background fabric is determined by adding together the dimensions of the canvas, plus the profile size (round-up to the nearest ½") times 2, plus the width of the wooden stretchers on the back times 2. For a 9" x 9" canvas, the math is:

9" + profile dimension (2½") doubled (5") + 1½" doubled  (3") to cover the stretcher bars on the back = 17" square. 9" + 5" + 3" = 17" square of fabric to be cut to be wrapped around the stretched canvas.   


First: The finished artwork is centered on the right side square of background fabric chosen. With a sewing machine, stitched the artwork onto the fabric square using a stitch-in-the-ditch along the inside edge of the binding.


Double Trouble, 9" x 9"

Secondly, lay this onto the top of the canvas making sure everything is centered and carefully begin wrapping two opposite edges around the canvas. Holding it flip the canvas over and begin stapling the raw edges along the back. Start stapling in the center of one side and gently pull the work across to be stapled on the opposite side center. It does not have to be stretch super tight. Be gentle.


Fold the excess at the corners like a miter and tuck them underneath before flapping the remaining two edges and stapling them in place. Staple along the edges to hold firmly. 


The final step is to place two eye screws inside the stretcher bars so that when strung with framing wire, the piece will lay flat against the wall when hung in place. 


How to make a Hangng Sleeve

My artwork has appeared in a number of exhibitions in art galleries and in museums. People are always interested in how a textile artist presents their art for such events. Because I design 3-layered textiles in quilted form, which are created to be displayed on walls, I have two ways of preparing my work to be included in gallery venues. A traditional method follows:

An inexpensive, traditional method would involve preparing a 4” wide sleeve that is attached along the back edge of the piece. The purpose of a hanging sleeve is to evenly support the weight of the quilt. The double sleeve, resembling a tube, also protects the quilt from being damaged by the hanging rod, dowel, or wooden strip. To make the sleeve, you will need muslin or fabric to match the quilt backing.

Directions:

Cut a strip 8½" wide and as long as the top edge of the quilt.  Fold the piece lengthwise, wrong side together.  Stitch the longest raw edges together with a ½" seam. Leave the two ends open. Press flat to make the first crease and the fold along the bottom edge of sleeve. Press the raw seam to one side; it will run down the middle of the casing. It will not show because the raw seam edge will be flat against the quilt and can not be seen once sewn down.  Roll the first crease down to form and press a second crease ¾" – 1" from the first one forming some extra ease or slack.

Measure and hem the ends so that the sleeve extends only to one inch on each side of the finished quilt edges. NOTICE: The sleeve has some slack to accommodate the size of the rod and to permit the quilt to hang flat. Without slack, the quilt might pucker or bunch up along the hanging rod.


Place & pin the sleeve on the quilt with the second crease along the lower edge of the binding at the top of the quilt back. Using a Blind Stitch, sew along the second crease and the bottom edge. No stitches should appear on the front side of the quilt. You may also stitch along the open ends to attach to quilt back, remembering to leave the opening for the rod to slip into.

Sunday, April 11, 2010

Winging It

Time to develop creative ideas always seems to be in short supply. Actually finding enough time in the day, week or month frequently is a premium commodity all too often. I think, we have become victims to the intensity of the noise around us, which tends to agitate us rather than inspire us. We read of others’ success and great accomplishments, and wonder, What’s wrong with me?

The perceived lack of adequate time pushes the artist to run into the studio and just start flinging supplies around hoping something wonderful will come out of the chaotic frenzy. Plowing full steam ahead may lead to spending time and money on a project that once finished, may be very disappointing. Trying new techniques and approaches without the benefit of experience and, yes, practice, can be fun and exhilarating but expecting awe- inspiring results can be deflating and anything but great. There’s nothing wrong with playing with your favorite supplies just to see what happens, but winging it is not recommended as a full time pursuit. One of my favorite sayings is, Winging it can be an artist’s best friend or their worst enemy.

I am one of those people, who will try-out, rehearse a new technique or a new art supply just to see what happens. Can I use it in my art? Is it a viable alternative to some method I know and use frequently? Will the technique accomplish what I envision for an image? Mostly, do I understand and appreciate the tar pit I may fall into if I use this technique?

Consequently, I make small samples before incorporating a new idea into a larger work. My example is Feather and Dot, 9" x 12". The smaller portion is 4" x 6½" and is the results of experimentation with a new supply in my arsenal. I like using tulle netting as shadows in my pictorials. I read about spraying tulle netting with "505® Spray and Fix", a temporary fabric adhesive, to position a single layer of tulle. I needed to know does it work? And, is it easier than another method of attaching netting? Yes, and the one pitfall is, the netting remained sticky to the touch for a very long time. Until the adhesive evaporates on tulle netting, it will attract dust, bits of thread and, I suppose flies and mosquitoes, although that did not happen.

The lessons learned were the advantages and disadvantages using 505® spray on some textiles. Making a small sample meant I didn’t lose 10 days on a larger piece because of tacky tulle netting. I also learned to place whatever I wish to spray with
505® in the bottom of a cardboard box to contain the spray droplets from lending stickiness to other nearby surfaces. It has its uses, is a great product, but one must read and follow carefully the instructions on the label.

Sunday, April 4, 2010

Pattern Envelope Contents

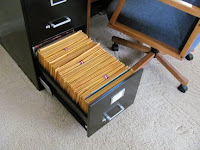
Because I am preparing for an art gallery show in July, and also working towards having an entry to meet the May deadline for the annual Houston show, the clasp envelopes I use to keep everything in order are the only "control" I have over potential chaos. When completed, each file goes into a file cabinet.

The question may be what kinds of items go into each envelope?

Using Badlands as an example that I have just pulled from my file cabinet, I open the labeled envelope and find not only the Master Pattern, but also, I discover small sketches of the beadwork pattern used on the jacket and the experiments I made to create the faux beadwork. A deadline prevented me from
learning genuine beadwork, which is taught locally by Native American artisans who learned from their grandmothers. Neatly folded are the tracing paper template patterns I followed of various sections in the master design. There is a small practice swatch of a border quilting design I did use. Each piece serves to remind me what occurred during the process.

For current work, I will place in its envelope a sample swatch of each fabric selected & glued to a recycled shirt cardboard, and the tracing paper template from which each piece is cut from freezer paper. I do not cut up the tracing paper template because I need it to keep an accounting of what has been done. Rather I make a freezer paper copy that is cut apart to make each fabric piece. If I am interrupted by another concern, when I come back that traced pattern serves to help focus me where I need to be without spending time matching and comparing, wondering and spinning wheels. The full size master pattern is on a wall and does not come down until the work is completed. It, too, is my reference guide throughout the work.

Another bonus for keeping envelopes is I love sorting through any envelope because I will discover notes written to me so I would not forget flashes of ideas during the building of a wall hanging. Revisiting former designs provide me with reminders of possible titles I conjured up in the middle of cutting or stitching. Ideas are written on a scrap of paper or on the Master Pattern. There may also be an address or a quote I heard on the TV or radio. Who knows what I will find on any piece of documentation? Occasionally, it can be down right hilarious to see the notes I wrote to myself, which leads me to ask another question, What in the world were you thinking, Carol?

The clasp envelopes are my documentation of each work that I create. If I ever wish to piggyback from a former work and use an element in a different manner in a new work, I can open any envelope and find the starting point. I can read my notes of inspiration to cheer me forward to completion of an original idea with a different viewpoint. Or, I can be reminded of pitfalls I may have encountered along the way. Either discovery is highly useful.

Sunday, March 28, 2010

My Patterns File

When I speak of My Patterns, these are not sale items but are a collection of all the paperwork involved with my artwork carefully filed in one place. One element of my organization plan, which is rated very high on my list of necessary things-to-do, is the careful keeping track of and containing all the bits and pieces of each new project from the beginning sketches to its conclusion. My system is fairly easy and goes far towards keeping track of stuff especially in the middle of the designing debris and chaos. It is most helpful during those times when I am designing and working on more than one idea, doing what I call ‘leap-frogging’ from one project to another. Who does not work on more than one task? The brain becomes tired with concentrating on only one design challenge at a time.

Each artwork begins with rough sketches as I try to capture the essence of an idea. As I zero in on the plan and begin to expand the concept, I will pull out a crisp, new 9 x 12 clasp envelope to make ready for containing all the bits and pieces: sketches, procedural notes to myself, and anything having to do with the design at hand. As time marches forward, the envelope is labeled and filled so nothing is lost because of chaotic studio effort. If the project is extra large in size, a 2nd envelope is started for the master pattern and any related sections used to make templates.

When the title for the art is determined, it is written on the envelope, and eventually a listing of contents is added for quick future reference. Each envelope is placed in alphabetical order in a metal filing cabinet, where each creative endeavor can ‘talk’ to one another about their high-ho times in my studio. Yes, my imagination tells me, that the envelopes start whispering to one another after I close the drawer.

This filing cabinet is important because I am able to return to artworks done years ago, open an envelope to refresh my working memory of any project. What did I learn from it? I have also on occasion borrowed from past work to launch a new and different one. I call it piggybacking, which makes further use of a great deal of designing effort performed earlier. I do not always have to re-invent the wheel with every new creative tasking.

Friday, March 12, 2010

The Inner Voices?

I appreciate musings about how to find the inner voice because it implies there really are voices that whisper motivational messages into the inner sanctum, which force the creation of superb examples of artistic talent. Oh, what if I do not hear the voices? What is wrong with me? And, if I hear conflicting advice from the sanctified ramblings, am I ready for the funny farm? The simple answers are: Don't worry...Nothing, and...Maybe, yes.

Let us become a little more realistic about that inner spirit each of us possess. Is one suppose to actually feel its presence, guidance and influence? The voice you are suppose to hear is YOURS, you are the Muse, and not some ethereal spirit waving a magic wand over your head. In order to tap into that part of your being, you have to give it space, quiet and freedom to do the back-flips you expect.

Your Muse requires frequent feeding, something like fertilizer we spread upon the flower beds to make the blooms pop open. A complete Muse fertilizer may have a variety of ingredients: Books, music, time alone, silence, sleep, change of scenery, nutritious food, sensual contact, moving at a snails pace as in slow down. The special ingredients are a little different for each of us. For me, in addition to the ones already listed, a glass of a very good wine, and the daily walks with my dog and husband are important. Ho-hum? Not at all, such things provide needed diversion for my Muse.

My Muse requires time and space for massaging the ideas and influences that may contribute to the really big idea worthy of my time and effort. She does rebel when overloaded with too many expectations, and she will shut down, go flat and stall. For many artists, we are our own worst enemy, in a sense, because we place such demands upon our Muse. We beat on her, expecting instant results, inspiration and blinding insight. We demand she run the marathon, meet the deadlines, weave fabric into golden panels, crank out those pieces of art to inspire awe from the public, and to keep up the frantic pace. Our personal Muses are often overworked with no time allocated to recuperate, repair and prepare for the next round of creative activity. We provide little time for getting anything in order and expect everything to be sensational. And, when it does not happen, we think "there is something wrong with me".

For those having a problem with kick-starting your Muse, give yourself permission to take a break to refresh yourself and your Muse that so much is depended upon. She's in there, she's just tired and needs a vacation from her benefactor. Or, perhaps she needs a boost with another plan of attack, another perspective, or a re-evaluation of the other priorities that weigh on the creative processes.

Thursday, March 11, 2010

Trumpets of Spring

In my past posting, I mentioned the yellow crocus that had survived the ice storm, and announced that the jonquils have bloomed. This cluster is ever faithful and poked up through the dark brown soil when I needed a boost in spirits the most. How can anyone be a grump when she spies the resounding joys of jonquils? These perky blooms are the ones I used last spring as inspiration for one piece in my garden series last year.

Back Fence Conversation

This time of year, there are many articles written offering help on many topics. Recently, I read an article about recommendations for starting home improvement projects and was struck by how similar the suggestions were to what I generally follow when creating my pictorial art.

Plan-Plan-Plan. Winging it can be an artist’s best friend or the worst enemy. Acknowledge the difference. Establishing goals and milestone markers fall under this idea, too.

Spousal support. No one needs a spouse laying cinderblocks on your creative path, stopping forward moment. Frequently, a spouse views these creative impulses as silly until the first works are sold, then suddenly, the light goes on and understanding is reached, as in "You can actually make money doing this stuff?"

Ask for Help. Plowing ahead can ruin some great projects. Asking for help does not mean you are committed to following that help or direction. Example: I ask my husband frequently what he thinks of a new idea I have or what he sees during the initial stages of a new work. I also tell him up front that the question does not require him to make a decision or take action. It is just talk, feedback that I need, and I may not follow his advice. He has learned to understand what I am asking and does not sulk when I ignore his opinion or suggestions. No spouse? Establish a small support group of artist friends to handle this concern.

Be realistic. Do you want to invest the time and money? Do you have the skills to do the project? If not…

Develop the Skills you need. Take classes and workshops. Read. Research. Experiment. Do the baby steps that will advance your mastering of skills and techniques required to reach the anticipated end results. This step also has great long-term benefits because an artist’s next project will be better than the last one.

Create a Budget. Determine the limits you are willing to spend if you have a tight budget. This is simply making the most of limited resources in order to reach the artistic goal. This may also suggest that conflicting budgetary demands may require re-evaluation and family cooperation. Where can I save money elsewhere so that I have the resources for the new projects? Again, be realistic, focus and be choosy about the next effort.

Create a Materials list. Identifying the supplies needed in advance of starting a new work will reduce wasted time rounding up stuff, trips to the store, or waiting for the arrival of postal delivery. This step also saves money.

Buy the right tools. This suggestion is not meant to provide the go-ahead to buy more tools. Rather, it means having the correct tools for specific tasks that the project requires, which eliminates frustration, poor workmanship and possibly on-the-job accidents. Invest in good quality tools, the best that you can afford. You may have to be patient and save up for the quality. You will have them a very long time and you will be happier.

Take care of the tools. Properly clean, repair, sharpen, oil, and put away carefully at the end of usage means those tools will be available the next time. I still use paintbrushes that I bought 30 years ago because I bought the best I could afford, and carefully cleaned them every time I use them. I wipe off my good scissors, periodically clean the rotary cutter, and have my sewing machines routinely serviced.

Measure Twice. Cut Once. Carpenters know this mantra–by–heart because it reduces waste and mismatched seams. If one is an artist that free–cuts and doesn’t like measuring anything, this tip may simply suggest that paying attention to what you are doing may eliminate the pain and suffering of not meeting the expectations.

Be safe as you work. Developing good work habits may spare the artist injury from inhalation of toxic fumes, from the tools and from the lack of concentration as you are working. Be aware of your surroundings and what you are doing to protect yourself, but also to shield little children and perhaps your pets that share your workspace. If your mind is wandering, stop and do something else.

My final word of advice is:


A cluttered workspace leads to muddled thinking and chaotic working, which interrupts the workflow in general.

Sunday, October 11, 2009

The Alliance for American Quilts

This past week I was honored to be interviewed for the project called, "S.O.S.–Save Our Stories: The Alliance for American Quilts. I was interviewed by Karen Musgrave who asked me to share a photo of my quilt, Prairie Thunder, for the archives, and to discuss my work: what inspires me, what is my creative process for making my textile artwork, how did I become interested in quilts and other personal insights. I was also asked to provide my views on other quilt-related topics, such as the meaning of quiltmaking in women's history.


Prairie Thunder, 67" x 54" (in a private collection)

Knowing that I am one among 1,000 participants-to-date in this program, I was highly complimented by the invitation and thoroughly enjoyed the opportunity. To realize that my words and my voice have been archived for use by people conducting research, and I suppose, by those who may be curious, is a humbling thought. I am grateful.

Thursday, September 24, 2009

Anticipation


With the swing of the weathervane, the recent winds have been coming from the North, which means cooler temperatures. These refreshing temperatures have fired up my energy for tackling the laundry list of ideas I have been accumulating all summer. I’ve completed a series of small works and will post them another day.

Today, however, I am very excited anticipating the International Quilt Festival in Houston next month. I have received the magic phone call telling me that Firestorm has received an award, but I won’t know the details until October 13th.

Monday, September 7, 2009

End of Summer Road Trips

Lately, I have been on the road providing lectures and workshops to quilting guilds. It’s an activity I truly enjoy because I get to connect with quilters of all age groups, level of expertise, and favored style of quiltmaking. It never fails to inspire me to associate with people who love to play with fabric to create wonderful textile art and are willing to share most everything with one another. I always learn so much from other quilters and am grateful for being able to meet each and every one.

As a reward for getting through this summer heat, I’ll jump in my car again and drive to Santa Fe for my annual renewal of creative zing that only the rarefied air of New Mexico’s capital can provide. I always find great subject matter for my quilted art, such as, Santa Fe, #304.

Friday, August 7, 2009

Garden Influences

There’s a full moon now but like the summer days it will soon begin to wane, although the high heat remains unrelenting. I don’t believe I can fault the full moon for my lack of energetic activity in my studio, but I am able to blame my inertia to the depressing heat, 101° F. today.

It doesn’t really matter for there will be a ‘dance of the moonflowers’ in my garden tonight. I noticed the two bushes are once more loaded with buds that are promising to pop open after dark to fill the air with wonderful scent. The full moon will spotlight the blooms. It’s always a fun little festival when this occurs.

I understand why this flower was among Georgia O’Keeffe’s favorites. It’s just a wild weed, but the plants provide endless pleasure and have inspired one of my favorite wall hangings.
Moonflowers at Midnight
42" × 35 " ©Carol Ann Sinnreich

Tuesday, July 28, 2009

Dog Days Dominate

In the last posting I wrote about the spectacular thunderstorms, which added wonderful shades of lively spring colors to the visual appeal of the prairie. It was incredibly exciting to drive over a hilltop and witness rolling greenness under a brilliant blue canopy. The open sky is what I love about this part of the USA.

In all fairness, the summer in SW Oklahoma as well as in Texas has been brutal with weeks of triple-digit temperatures and little rain. The ranchers are taking another hit with dried up pastures and low water levels in ponds for their livestock. The temperatures have forced me to hide indoors embracing the air conditioning vents and thanking Willis Carrier for being so clever. The dog days of summer trigger sympathy for the polar bears as they wait for the returning ice floes to provide relief.
During the last brutal blast of summer heat in 1998, I designed a landscape to acknowledge what was happening out there on the prairie day and night, and in church on Sunday mornings.
The scenario is repeated this year as
in Summer Prayers,
©Carol Ann Sinnreich.

Thursday, June 11, 2009

Springtime on the Prairie

Recently, waves of bold thunderstorms have crossed the Oklahoma’s prairie anointing the winter parched earth with much needed rains. Unfortunately, the timing of these spring storms have been either too late for the ranchers, or in time to disturb the wheat harvesting. And yet, happily the lakes are now brimming, the waving prairie grasses are green, the brightly colored wildflowers are abundant and, for the time being, the prairie and its animals are no longer thirsting for water. All is verdant and lush, the birds are singing and new animal babies are frolicking for the fun of it. It’s a great deal more appealing than anticipating the prairie fires, which may occur in the drier months ahead.


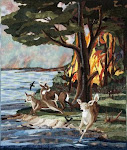
Visually for the artist in me, this new season is a joy to witness particularly since I spent much of the late winter finishing my newest work, Firestorm. I have been focused on the power, the heat, and total devastation of a forest fire, its impact on frantic animals seeking refuge in a lake, and trying to recreate with fabric a pictorial representation of it all.
Firestorm, 51" w × 61" l
©Carol Ann Sinnreich, 2009


Tuesday, April 14, 2009

Backbone of My Work

I am frequently inspired by my Oklahoma environment as well as by the histories I read. Today as I walked with my dog down a dirt road around an isolated reservoir I was enchanted by the wispy white clouds in the cerulean sky, the bright sunshine, the bold breezes swirling the dried grasses and the tree thickets spouting green lace in their crowns. I love my time on the prairie because the structure of the earth is so obvious and appealing for me. My dog thinks it’s great, too.

On these walks it is not unusual to flush wildlife. Today it was a covey of quail. Yesterday it was white tail deer. Sometimes it’s a flock of wild turkeys. We’ve even caused rooting wild pigs to scatter and that was a bit exciting. I never know what I’ll see and am always delighted because these sightings enter my imagination, stay there and begin to formulate images to incorporate into my pictorials.

The one thing I can do well is draw. I believe that drawing is the backbone of good artwork. I make many sketches as I work out an idea. As I focus on the one that will produce a final composition, I will work harder on capturing the details. It’s not wasted time because these drawings familiarize me with my subject and helps me anticipate where I will have challenges when translating the composition into a fabric representation.

That deer from the other day has been added to my current work. I have a knack for being able to turn an animal around and draw it from any direction. The deer was leaping away from me, but in this piece, the doe is running at the viewer. Here is the master drawing I am using to assemble the deer.

Wednesday, March 18, 2009

Photo Morgue

During the development of a new design, I rely upon my drawing skills and art experiences to establish the integrity of an idea, a new design. Accuracy of details is important to me. I maintain a variety of reference materials to assist the effort: anatomy books, historical photos as well as a wealth of digital images I have taken, plus postcards, and clippings from magazines and newspapers.

Many artists keep a photo morgue, which is a collection of ephemera. My collection is carefully filed in four file boxes. My computer organizes my digital images and I do make CD copies of my photos. And lastly, books, I buy lots of reference books.

I can’t possibly have instant recall about body movement of people or animals, nor remember what period clothing looks like. I rely upon my photo morgue and other references to assist me with details. However, I do not copy directly from any source. That would be an infringement upon another person’s copyrighted creative effort. I am emphatically diligent about respecting Copyrights.

Friday, February 13, 2009

Ideas & Research

Where do I find my ideas for my work? Firstly, as a child my imagination was fueled by Walt Disney animated films. In my mind, the occasional scampering mouse in my home is wearing a little sweater and cap; his name is always Ben. The incredible Disney artists of those early films introduced me to drawing and creative ideas. Art school and life's experiences refined my approach and technique.

My imagination is always the starting point. I live in Oklahoma. People, open sky-vistas and history of the old American west surround me and make me pause to consider possibilities. I love reading 19th century histories and diaries, which does spark many ideas. Also, hiking at the nearby wildlife refuge allows me to see deer, coyotes, elk, bison, long horns, and, yes, hawks making lazy circles in the sky. These critters prove to be equally fascinating and subjects for my textile art. I carry a sketchbook and a camera.

"No Time To Waste" began with reading a brief history of the Pony Express. Immediately I started hearing the drumming of hoof beats, then I "saw" the distant rider gaining size as he approached the station. Soon the dogs started barking to announce his approach; then, the waiting riders began to shout while rounding up fresh horses. This image in my mind started swelling and took shape with many rough sketches until I found the tableau I wish to prepare. If I don’t "see" and "hear" an idea in my head, a design will hardly blossom.

If I am portraying an era, I believe the details must be as accurate as possible. I do research by looking at period clothing, tack, and other items at a local museum, which permits me access to their collections. The staff also allows me use of their extensive library, where I study old catalogs and other reference materials. And, yes, I have assembled home library of references.

Sunday, February 1, 2009

Padded Hangers & Hanging Bags

I prefer hanging my large bed quilts in a closet rather than wrapping each on a tube. I am equally meticulous about the hangers as I am with the tubes I use for rolled quilts. I bought my heavy-duty wire, blanket hangers from the dry cleaners. These inexpensive hangers came with a thick cardboard roller attached. Each hanger can adequately hold the weight of a large quilt with no sagging. Metal hangers may corrode; adaptations had to be made to protect the textiles.

As with plain tubes, I wrap the roller on the hanger with aluminum foil, then apply strips of batting to pad the roller. I wrap the batting up the sides of the hanger to provide a barrier between the wire and the hanging textile. The batting strips are anchored in place with basting thread and large stitches. Wrapping the batting roll with pre-washed muslin is optional. The hanger is ready for the quilt.

I recycle projects that never made it into a show or simply lost their appeal into Hanging Bags to cover quilts or special clothing. Of course, one can make a "plain jane" bag from muslin but that’s boring. A plastic dry cleaner bag* can serve as a pattern, or, you can make a paper pattern by outlining the shape of the hanger shoulders. Be sure to add enough allowance to avoid the finished bag from being too snug to slide over the quilt on its hanger. I add a hanging tag to the bag for identification purposes.
*Please don't use plastic bags to cover textiles. Plastic retains moisture and could cause mildew.

Saturday, January 31, 2009

Quilt Storage Tubes


As a consequence of volunteering at my local museum and working with its quilt collection, I like to roll my quilts on cardboard tubes that have been prepared following museum guidelines.

I glean hard cardboard tubes from a local fabric store or carpet outlet. For smaller quilts, use the tubes from waxed paper or plastic food wrap. The first step is to wrap the tube with aluminum foil because the foil serves to trap and contain any gases emitting from the cardboard. After wrapping, tuck the foil into the tube ends to hold in place. Follow by covering the foil with leftover batting to pad the tube.

Pre-washed muslin is used to cover the padded tubing. I quickly hand sew a seam using an overcast stitch, the length of the tube to secure the muslin covering. Others like to use a strip of fusible to close this seam, but I’m concerned with the fusible breaking down causing the sticking chemical to permeate the muslin covering and contaminate the quilt. Simple cloth ties are used to hold the rolled quilt in place. A long cloth bag is constructed into which the rolled quilt is slipped. And, yes, I store more than one quilt on a tube.

To aid the quick identification of quilts once hidden away in cloth bags, I use hanging tags that are purchased from an office supply store. Each tag has a reinforced hole with a string for attaching to the bag. I write the quilt names in pencil on the tag and pin it to the bag so I can easily read the bag’s contents. I tend to switch quilts from one roll to another over time, so I use pencil to write the information on tags. It's easy to erase pencil and I’m Scottish enough not to write new tag each time I pull a switcher-roo.

Next posting, Hanging Bags for Quilts.